Mastering Dual Blades in Monster Hunter Wilds: Moves and Combos Guide
- By Henry
- Jun 12,2025
In the wild and untamed world of *Monster Hunter Wilds*, brute strength isn't always the key to victory. Sometimes, it's the hunter who wields speed, agility, and precision that emerges triumphant. When facing down even the most formidable beasts, the Dual Blades offer a unique playstyle that rewards quick thinking and relentless offense. Here’s how to master this deadly weapon system and dominate the hunt.
Recommended Videos
Dual Blades in Monster Hunter Wilds
Known for their blistering combo potential and fluid mobility, the Dual Blades are one of the most dynamic weapons in *Monster Hunter Wilds*. Whether you're weaving through enemy attacks or chaining high-damage strikes, understanding how to switch between Demon Mode and Archdemon Mode is crucial to maximizing your effectiveness on the battlefield.
All Moves
| Command | Move | Description |
|---|---|---|
| Triangle/Y | Double Slash/Circle Slash | Begin your combo with a Double Slash, then follow up with another Triangle/Y input to execute a Circle Slash. |
| Circle/B | Lunging Strike/Roundslash | Slash forward in the direction of the analog stick. Press again to perform a Roundslash. |
| R2/RT | Demon Mode | Activates Demon Mode, increasing attack power, movement speed, and evasion while granting knockback immunity. |
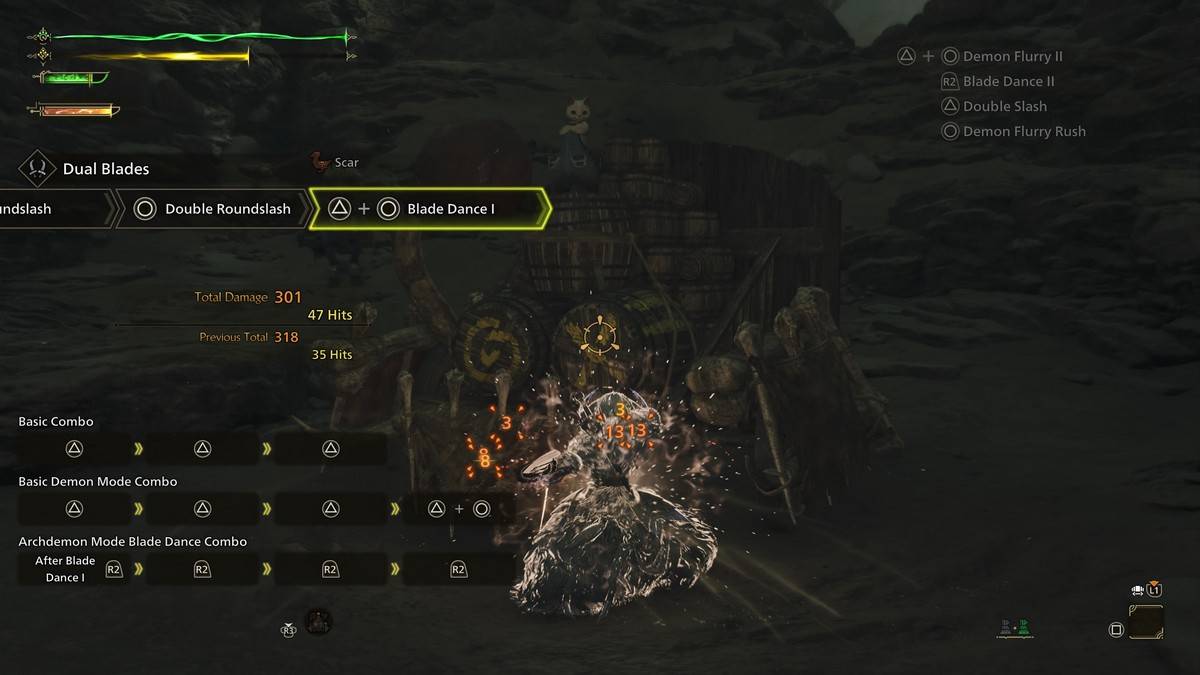
| Triangle/Y + Circle/B (In Demon Mode) | Blade Dance I, II, III | Execute powerful chained attacks that consume the Demon Gauge. |
| Triangle/Y + Circle/B (In Archdemon Mode) | Demon Flurry I, II | Unleash devastating multi-hit combos exclusive to Archdemon Mode. Use the analog stick to control movement direction during the sequence. You can chain these with Blade Dances using R2/RT. |
| Cross/A (During Demon/Archdemon Mode) | Demon Dodge | Perform a faster-than-normal dodge. A Perfect Evade allows you to counterattack mid-dodge and grants a temporary damage boost. Does not deplete the Demon Gauge in Demon Mode. |
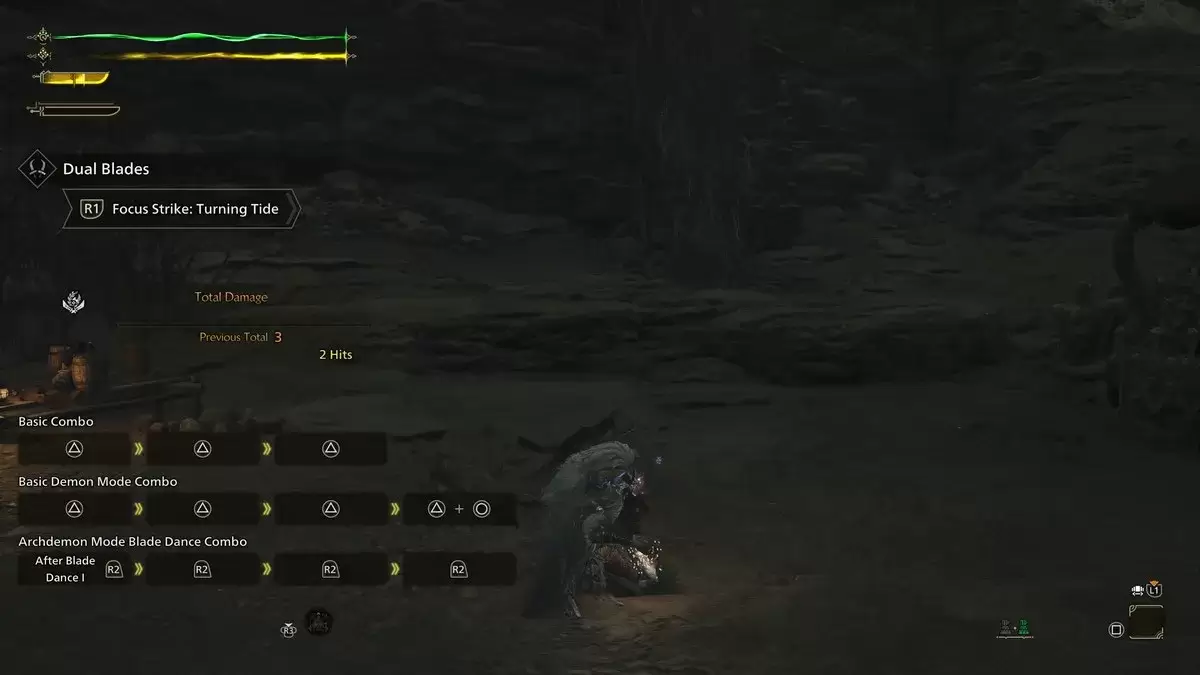
| L2/LT + R1/RB | Focus Strike: Turning Tide | A wound-targeting slash that triggers a Midair Spinning Blade Dance when hitting an injured area. This move covers the full length of the monster and can destroy multiple wounds at once. |
Demon Mode / Demon Gauge and Archdemon Mode
The Dual Blades feature a unique resource system via the Demon Gauge. Activating Demon Mode boosts your attack, speed, and evasion, while also nullifying knockbacks. However, stamina continuously drains while in this mode, and it ends automatically when stamina reaches zero or manually by the player.
Landing successful hits in Demon Mode fills the Demon Gauge. Once maxed, you enter Archdemon Mode, where the gauge slowly depletes over time but can be used to fuel more powerful attacks. Both modes can be active simultaneously, and mounted combat pauses the Demon Gauge drain—giving you time to plan your next move without penalty.
Demon Dodge
Triggered by a Perfect Evade, Demon Dodge enhances both physical and elemental damage output and allows you to strike while evading. It grants a 12-second damage boost, with each subsequent dodge dealing additional damage as you spin forward.
Combos
Effective combo execution revolves around mastering transitions between Demon and Archdemon Modes. Knowing how to chain moves together ensures consistent pressure and optimal damage output.
Basic Combo
Start with three consecutive Triangle/Y inputs: Double Slash > Double Slash Return Stroke > Circle Slash. This versatile combo delivers reliable damage across various hunting scenarios.
Alternatively, use the Circle/B command thrice for Demon Flurry Rush > Spinning Slash > Double Roundslash. This combo rapidly fills the Demon Gauge while maintaining offensive momentum.
Demon Mode Basic Combo
While in Demon Mode, enhance your basic combo with increased speed and power: Demon Fangs > Twofold Demon Slash > Sixfold Demon Slash. Finish with Triangle/Y + Circle/B to initiate Demon Flurry I.
Archdemon Mode Blade Dance Combo
Once the Demon Gauge is fully charged, activate Archdemon Mode and unleash devastating damage. Begin with Blade Dance (Triangle/Y + Circle/B) in Demon Mode, followed by four presses of R2/RT to transition into Demon Flurry I, Blade Dance II, Demon Flurry II, and finally Blade Dance III. This seamless mode-switching maximizes burst potential.
[ttpp]
Dual Blade Tips
A true Dual Blade specialist seamlessly shifts between Demon and Archdemon Modes, blending offense and utility for sustained dominance in battle.
Always Follow Up
Begin with the Demon Flurry Rush combo: Circle/B x3, followed by three sets of Triangle/Y + Circle/B. This efficiently fills the Demon Gauge and transitions into high-damage sequences, offering superior uptime compared to slower weapons like the Great Sword.
Keep
Latest News
more >-

- Vampire Survivors Unleashes Major Content Update
- May 17,2026
-

-

- Atlan, One Punch Man Crossover Launches June 26
- May 14,2026
-

- Sims 4 Burglary Event Returns
- May 12,2026
-

- "Dune: Awakening" opens character creator
- May 12,2026